3-Ingredient Peanut Butter Pumpkin Dog Treats: Easy Baked Recipe
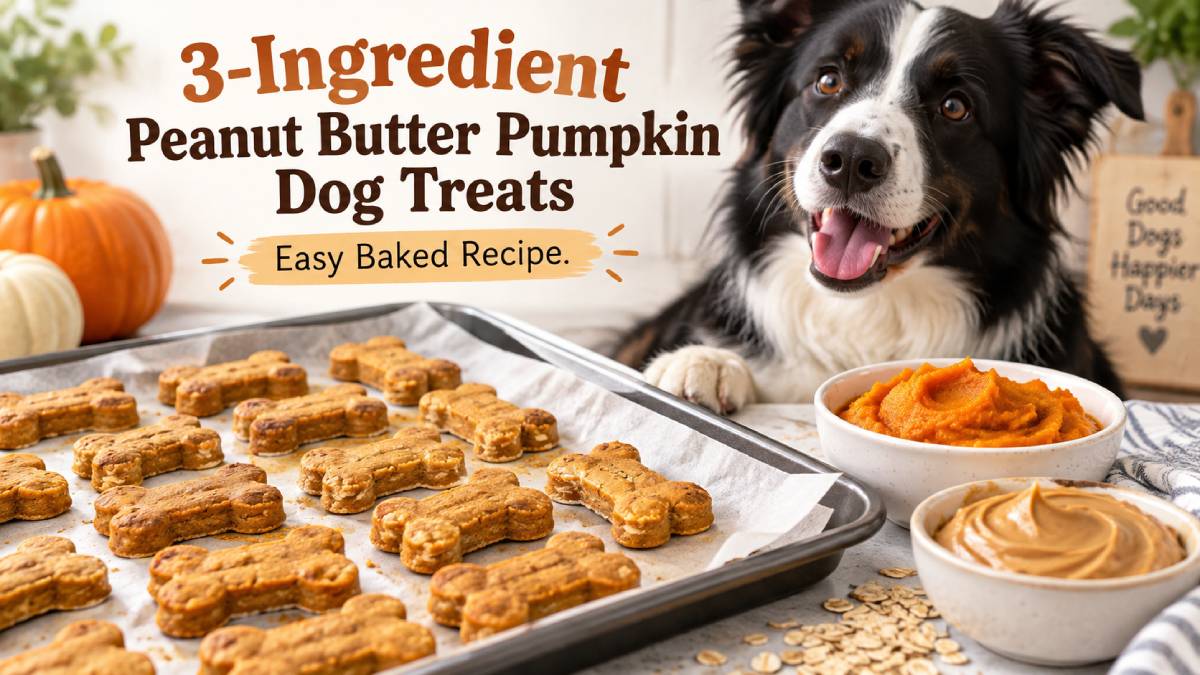
Three-ingredient peanut butter pumpkin dog treats need only plain pumpkin puree, xylitol-free peanut butter, and oat flour. The dough is easy to shape, the baked treats smell appealing without added sugar, and you can control whether they finish soft or firm by changing the thickness and baking time.
The ingredient list is short, but the safety check is still important: use 100% pumpkin rather than pumpkin pie filling, and verify that the peanut butter contains no xylitol. These treats are calorie-dense enough that small pieces are usually the better choice, especially for small dogs or dogs watching their weight.
Ingredients
- 1/2 cup plain pumpkin puree: Use pure pumpkin, not sweetened or spiced pie filling.
- 1/4 cup xylitol-free peanut butter: Choose a plain product and check the ingredient label carefully.
- 1 1/2 cups oat flour, approximately: Add gradually until the dough can be rolled without sticking heavily.
How to Make It
- Heat the oven to 325°F (165°C) and line a baking sheet with parchment paper.
- Stir the pumpkin and peanut butter until smooth and evenly blended.
- Add one cup of oat flour and mix. Continue adding flour a little at a time until the dough is soft but rollable.
- Roll between two sheets of parchment to the thickness you prefer. Thicker pieces stay softer; thinner pieces become firmer.
- Cut small shapes and move them to the prepared sheet. Reroll scraps only as needed so you do not work excess flour into the dough.
- Bake until the treats are set and dry on the surface. Cool completely before serving or storing.
Why Three Ingredients Are Enough
Pumpkin provides moisture, peanut butter adds fat and helps the dough hold together, and oat flour absorbs that moisture into a shapeable mixture. There is no need for sugar, salt, frosting, baking powder, or oil. The result is closer to a simple dog biscuit than a human cookie.
The exact flour amount can vary because pumpkin puree and peanut butter do not have one universal consistency. Natural peanut butter can be runnier after stirring, while some pumpkin brands are thicker than others. Add oat flour gradually instead of forcing the recipe to match a number on the page.
The Peanut Butter Label Check You Should Never Skip
Every batch starts with the jar, not the mixing bowl. Read the full ingredient list and confirm that the product contains no xylitol. Do not assume “natural,” “sugar-free,” or “healthy” marketing means it is suitable for dogs.
If the peanut butter has separated, stir it thoroughly before measuring. Otherwise you may scoop mostly oil from the top of the jar and end up with a greasy dough. A well-mixed jar gives more consistent results and makes it easier to judge how much oat flour is needed.
How to Make Soft or Crunchy Pumpkin Peanut Butter Treats
For softer treats, roll the dough around 1/3 inch thick and bake only until the surface is dry and the center feels set. Cool, then refrigerate. For a firmer biscuit, roll thinner and leave the treats in the oven slightly longer, checking frequently so the edges do not burn.
Harder is not automatically better. Dogs with dental disease, missing teeth, or painful chewing may need a softer texture. If you are making treats for a senior dog, aim for easy breaking rather than a long-lasting crunch.
Simple Variations Without Turning This Into a Dessert
You can press a few pieces of the dog’s normal kibble into the top before baking for a different texture. Another option is to make small thumbprint-style rounds and place a tiny dab of plain pumpkin in the center after baking. Keep extras small so the three-ingredient recipe does not quietly become a high-calorie snack.
If you want a different flavor entirely, use another recipe designed around that ingredient instead of adding multiple foods to this dough. Short ingredient lists are useful when you are trying to identify what a dog tolerates well.
How Much Should You Give Your Dog?
Think of homemade treats as extras, not as a second meal. A simple approach is to cut or break the finished recipe into pieces that suit your dog’s size, then use the smallest piece that still feels rewarding. Training treats can be pea-sized for many dogs because the reward comes from frequency and timing rather than from a large portion.
For a toy or small dog, one full-size waffle corner, pancake, cookie, or cake slice can be much more than a casual snack. For a large dog, it can still be surprisingly calorie-dense if peanut butter, oats, or eggs are involved. Start smaller than you think you need and remember to count other snacks, dental chews, table scraps, and food used for training that day.
If your dog is overweight, has pancreatitis history, diabetes, kidney disease, gastrointestinal disease, food allergies, or is eating a veterinarian-prescribed diet, do not assume a homemade recipe is automatically appropriate. Ask the veterinarian or veterinary nutrition team how treats should fit the dog’s specific plan. Sometimes the safest treat is a measured portion of the dog’s regular food.
Dog-Treat Safety Rules That Matter More Than the Recipe
Homemade does not automatically mean safe, so ingredient selection matters more than whether a recipe came from your own kitchen. The biggest practical rule is to keep the ingredient list plain. Skip chocolate, grapes, raisins, macadamia nuts, onion, garlic, chives, alcohol, caffeine, and heavily seasoned human-food ingredients. The ASPCA’s list of people foods to avoid feeding pets is a useful check when you are unsure about an add-in.
Xylitol deserves a separate warning because it can appear in products that otherwise look dog-friendly, especially sugar-free foods and some nut butters. The FDA warns that xylitol can cause a rapid, dangerous drop in blood sugar in dogs and may lead to more serious complications. Every time a recipe uses peanut butter, read the ingredient label first and choose a product with no xylitol, birch sugar, or similar xylitol labeling.
These recipes are treats or toppers, not nutritionally complete meals. VCA’s veterinary nutrition guidance explains that treats should generally stay within about 10% of a dog’s daily calories, leaving the rest for a complete and balanced diet. That limit is especially useful with calorie-dense ingredients such as peanut butter, eggs, oats, and richer meat-based toppings.
The right serving size also depends on the individual dog. A large, active adult dog may be able to handle a bigger piece than a five-pound senior dog, but body size is only one part of the decision. Weight goals, medical conditions, food sensitivities, prescribed diets, and the rest of the day’s treats all matter. The WSAVA Nutrition Committee’s treat guidance recommends checking with the veterinary team when a dog has a medical condition, dietary sensitivity, or therapeutic diet.
Introduce any new homemade treat in a small amount the first time. Even ingredients that are generally dog-safe can cause loose stool, gas, or vomiting in an individual dog if the portion is too large or the food is unfamiliar. If your dog develops repeated vomiting, marked lethargy, abdominal pain, swelling, breathing difficulty, collapse, or another concerning reaction, stop the food and contact a veterinarian promptly.
How to Introduce a New Homemade Treat
Start with one small piece on a day when you can observe your dog normally. Do not introduce several new foods at once, because if stomach upset develops you will not know which ingredient was responsible. Keep the rest of the dog’s routine stable and avoid giving a large first serving simply because the dog likes the smell.
Watch for vomiting, diarrhea, excessive gas, itching, facial swelling, or an obvious change in energy after a new treat. A mild one-time soft stool can have many causes, but repeated symptoms or a stronger reaction deserve veterinary advice. Dogs with known food allergies, inflammatory bowel disease, pancreatitis, diabetes, kidney disease, or other medical conditions need more individualized guidance.
If the treat agrees with your dog, you can use it again in measured portions. Consistency makes it easier to understand what your dog tolerates and prevents a kitchen full of changing ingredients from quietly adding a lot of extra calories.
How to Keep Homemade Treats From Replacing Balanced Food
A homemade snack can look wholesome because it contains familiar foods, but familiar does not mean nutritionally complete. Dogs need specific amounts and ratios of amino acids, fatty acids, vitamins, minerals, and other nutrients across their diet. A simple treat recipe is not designed to meet all of those requirements.
That is why the practical 90/10 approach is useful: most daily calories come from complete and balanced dog food, while treats occupy a small allowance. If you use homemade pieces for training throughout the day, reduce the size of each reward rather than letting every repetition become a full snack.
For dogs that need many training rewards, another option is to reserve part of the dog’s regular meal and use those kibbles or measured food pieces during training. The homemade treat can then stay special without pushing total calories upward.
Choosing Ingredients for a Sensitive Dog
Short recipes are helpful when a dog has a sensitive stomach because there are fewer variables, but “sensitive” is not a diagnosis. If symptoms are frequent, severe, or tied to many foods, talk with a veterinarian rather than cycling through homemade recipes. An elimination diet for suspected food allergy needs to be controlled carefully to produce useful information.
When trying a recipe for a dog with no known medical restriction, choose ingredients the dog has already eaten without a problem. That is usually a better starting point than introducing several trendy ingredients at once. Plain preparation also makes it easier to spot accidental additions such as seasoning, sugar, or sweetener.
Making Homemade Dog Treats More Practical
Portion the batch before storing it. If the entire container is full of large cookies or thick slices, it is easy to over-serve. Cut them to the size you actually intend to use, then refrigerate one small container and freeze the rest.
Label freezer containers with the recipe name and date. That sounds overly organized until several similar-looking orange pumpkin treats are frozen at once. A label also helps if you later need to tell a veterinarian what your dog ate.
Keep human and dog treats separate, especially when they look similar. A dog-safe cookie may be bland to a person, while a human cookie may contain chocolate, raisins, macadamia nuts, or a sugar-free sweetener that is unsafe for dogs. Separate containers reduce mix-ups.
Storage, Freezing, and Food-Handling Tips
Homemade dog treats do not contain the commercial preservatives that make packaged biscuits shelf-stable for long periods. That is a benefit if you want a short ingredient list, but it also means storage needs more attention. Moist recipes should generally be treated more like fresh food than like a dry pantry biscuit.
Let baked items cool completely before you close them in a container. Trapping steam creates condensation, and condensation shortens shelf life by keeping the surface damp. For soft or moist treats, use a covered container in the refrigerator and make a smaller batch if your dog will not finish them quickly.
Freezing is the easiest way to stretch a batch without pushing freshness. Place individual pieces on a tray until firm, then transfer them to a freezer-safe container or bag so they do not freeze into one large block. Small treats can often thaw in the refrigerator overnight, while a single portion may only need a short time at room temperature before serving.
Discard any treat that develops mold, an unusual smell, slimy moisture, or a texture that seems clearly different from when it was fresh. When in doubt, throw it out. A few saved treats are not worth a stomach problem.
Common Recipe Problems and Easy Fixes
The mixture is too dry: Dog-treat doughs can change depending on how finely the oats are ground, how large the egg is, and how thick the pumpkin, applesauce, or peanut butter happens to be. Add plain water one teaspoon at a time until the mixture holds together. Avoid pouring in a large amount all at once because it is much harder to correct a wet dough.
The mixture is too sticky: Give oat-based dough five minutes to rest before adding more flour. Oats absorb moisture as they sit. If it is still too sticky to handle, add a small spoonful of oat flour and mix again.
The treats are browning too fast: Dog recipes do not need a deeply browned crust to taste good to a dog. Lower the heat slightly or shorten the baking time if the edges are coloring before the center sets. Dark pans and small pieces often cook faster.
The finished treat is harder than expected: Thickness and baking time change texture dramatically. Thinner pieces lose moisture faster and become crisp; thicker pieces usually stay softer. For senior dogs or dogs with dental issues, keep pieces thicker, bake just until set, and refrigerate them rather than trying to dry them into shelf-stable biscuits.
Your dog is not interested: Do not keep adding sugar, salt, cheese, bacon grease, or rich toppings to make a homemade treat more exciting. Dogs have individual preferences. A different safe ingredient, smaller portion, or even the dog’s regular kibble may work better.
Frequently Asked Questions
Can I use almond butter instead of peanut butter?
Only consider a plain nut butter if the ingredient list is dog-safe and your dog already tolerates it. Peanut butter is the tested base for this recipe, so substitutions can change both safety and texture.
Can I use quick oats instead of oat flour?
You can grind plain quick oats into a fine flour. Measure after grinding because whole oats and oat flour do not pack the same way.
Do these treats need refrigeration?
Soft or moderately moist homemade treats should be refrigerated. If you bake them very dry, they may keep longer, but refrigeration is still a simple conservative choice.
Can puppies have peanut butter pumpkin treats?
A tiny piece may be suitable for a puppy that tolerates the ingredients, but puppy diets are designed for growth. Keep treats small and do not displace normal puppy food.
Why is my dough cracking?
It is probably too dry. Knead in a teaspoon of pumpkin or water, then let the dough rest briefly before rolling again.
A Simple Way to Use This Recipe
Make the smallest batch that is practical, serve a modest first portion, and keep the rest cold. The recipe works best as an occasional extra alongside a complete and balanced diet, not as a substitute for one. If your dog has a diagnosed condition or a prescribed diet, use the veterinary plan as the priority and ask before adding a new homemade treat or topper.
The FDA also notes that homemade pet treats can be made for your own animal, while reminding owners that ingredients such as chocolate, grapes, raisins, onions, garlic, macadamia nuts, and xylitol can be harmful. You can review the FDA’s pet health and homemade treat safety guidance when checking a new ingredient.